Whether they are new or have been in use for years every air compressor will one day have air compressor problems, and fixes to resolve those problems. There are many pages linked below, each addressing many of the issues compressor owners may encounter with their compressor.
Table of Contents
- What’s here on air compressor problems and fixes?
- General air compressor issues
- Capacitor issues
- Compressor air leaks
- Compressor will not start / will not stop – run issues
- Compressor motor electrical issues
- Compressor air gauges
- Oil issues
- Air Compressor Parts and Repair Issues
- Pressure and Flow Problems
- Pressure Relief Valve Issues
- Pressure switch problems and solutions
- Pump Problems
- Regulator issues
- Tank check valve issues
- Unloader valve problems & issues
What’s here on air compressor problems and fixes?
- First come links leading to pages about general compressor problems by category. We invite you to scroll the list below and follow the links to the many pages that will help you fix your compressor!
- Further on down the page is a link to a page on this site with links to pages about specific makes or model of compressors. Most pages have a comment section where you can leave a question about that specific make of compressor.
- And… if you have a tip for another compressor user? Please leave a comment on the appropriate page or for the appropriate comment to help others and to pay it forward. Thanks for that.
General air compressor issues
Capacitor issues
Compressor air leaks
- compressor is always leaking air
- air is coming from the oil fill tube
- compressor is leaking air under the hood
- air leaks from the compressor dipstick
- compressor has air coming out of the intake filter
- all the air comes out of the coupler
- air leaking around the pump head
- compressor shuts off and all the air leaks out
- air keeps leaking out of the pressure relief valve
Compressor will not start / will not stop – run issues
- air compressor will not start
- air compressor will not stop
- air compressor runs and runs
- air compressor gets very loud
- air compressor cycles on and off all the time
- air compressor just hums
- air compressor will not start when cold
- compressor trips the breaker when restarting
- compressor will not restart when air is used
- new pressure switch and still the compressor won’t stop
Compressor motor electrical issues
- compressor is blowing fuses & breakers
- compressor wiring problem
- the lights dim when the air compressor starts
- compressor trips breaker on pressure drop
- how to find a replacement compressor capacitor
- a clicking air compressor
- compressor just hums
- breaker trips when compressor restarts
- air compressor motor thermal cut out
Compressor air gauges
Oil issues
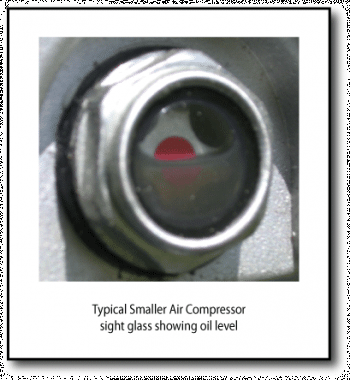
Air Compressor Parts and Repair Issues
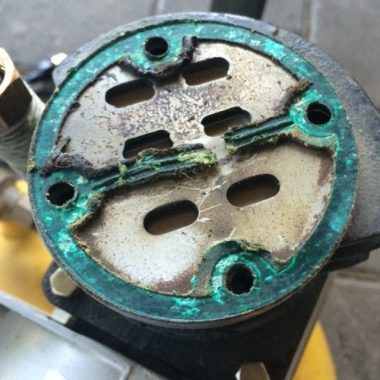
Pressure and Flow Problems
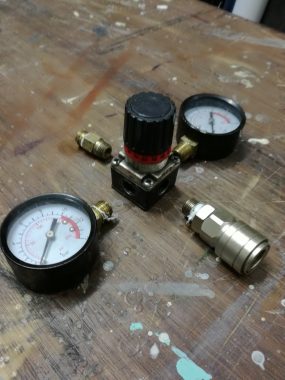
- compressor has low outlet pressure
- I get only a short burst of air
- I need more air out of my compressor
- do I need a larger air line?
- I get no air out of the air hose
- what’s the difference between PSI & CFM?
- compressor will not build pressure
- will my air compressor take off lug nuts?
- is my air hose too long?
Pressure Relief Valve Issues
Pressure switch problems and solutions
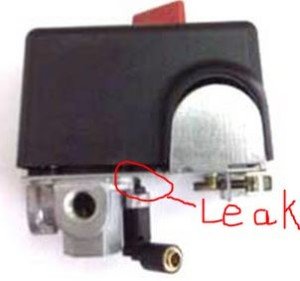
Pump Problems
Regulator issues
Tank check valve issues
Unloader valve problems & issues
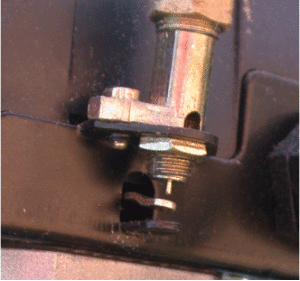
Got a problem with a specific brand of compressor? Here’s where you can find the answer or post your own question about that brand if no answer if desired!


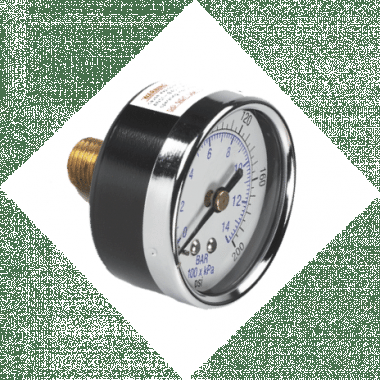
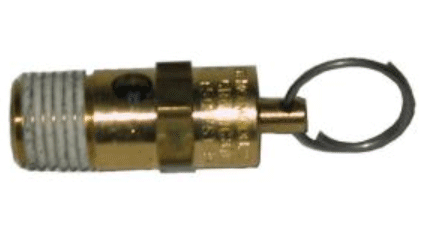
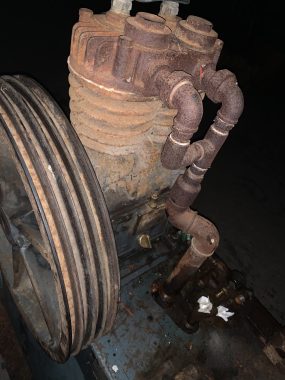
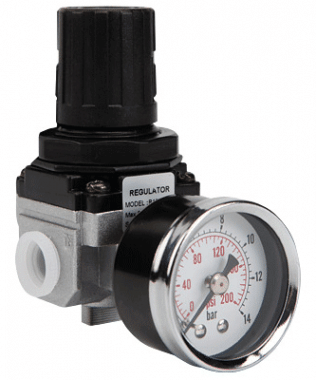
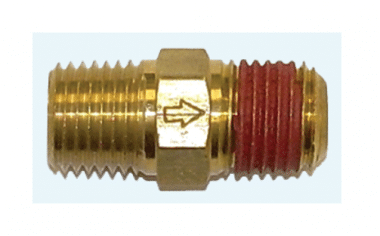


Hi I have a central pneumatic 3hp 21gallon air compressor it runs and run kicks breakers so I drained the oil it was bad so I took off the side plate and was cleaning it out and noticed the the connecting rod moves side to side on the shaft and there looks like there is supposed to be a pin or set area to hold it in place I would love it if someone could tell me if it is supposed to have one so I can fix it thank
What is the average cost to replace an air end on a 375 cfm compressor
Hi! I have a 80 gal Dewalt 240 v 5 rhp (. 6 hp) motor. Bought it new about 7 years ago. Installed it within 4 ft of breaker box, with disconnect switch with non20 amp fuses in between . Has done well until about a month ago, when I noticed a fuse was blown in the disconnect switch.. Since then blew several fuses. Replaced pressure switch after checking connections and verifying volts on each leg., just throwing a part at the problem.. Then checked all 3 capacitors & all were well within uf range. Took motor off & took to a rebuild shop to have it checked. They said nothing was wrong with the motor. It was still hooked up on the test bench & they showed me that it would run, but no load was put on it. Put back on & tried again. Also the compressor turned freely by hand., prior to having it checked. Same problem of blowing fuses in disconnect switch. So continuity was checked through each wire & terminal, through the disconnect switch terminals & the pressure switch. Made jumpers & bypassed pressure switch. Still blew fuses. Removed belt & motor runs in ccw direction from output shaft end like it’s supposed to.. Probably just need a new motor. Would the exact motor need to be installed or are there options?
My compressor starts and runs for about a minute then it sounds like its seizing getting slower and then stops, if i then drain down the air its runs normal again for a minute then does the same again. Any ideas compressor is a 240v 3hp twin with 100ltr tank
I’ve got a Sears Craftsman model # 919-176330. 3HP, 30gal tank. Over an 8-hour period the tank completely depressurizes. I’ve soaped every fitting, tightened those which were leaking. Checked all drain connections, tank plugs on each end, compressor discharge tubing connections at the head and tank, pressure switch unloader tubing at head and switch, both gauges, regulator discharge hose connection.
Once the tank was up to pressure and stopped, I loosened the tubing connection from the head to the tank and soaped at the loose head fitting, no bubbles anywhere. I’m stumped.
I have a Kobalt 99007 air compressor and the tires won’t hold air. I want to replace with solid tires but can’t seem to get the hubcaps off. I have tried everything I can think of. It sits recessed in the wheel housing. Have tried getting pliers, needle nose vice grips, screw driver, even drilled hole through hub cap to solid axle trying to weaken the integrity of it. Nothing has worked. It is a one time use part to be replaced when changing wheels. I have contacted Lowes and Kobalt and neither can help only refer me back to the other.
Hey I am just trying to change out our tires and my husband ended up hitting the tire on the inside until the cap thing flew off and we got the tire off. Hope that makes sense.
i have a very old compressor its a curtis model 40 and it has a setup wherein weights on the pump flywheel move out by centrifugal force and they open or close, I think what is basically an unloader valve at the top of the pump valve head, that is how it is supposed to work. fortunately I have been able to use the compressor without the long arm from the flywheel connected to the plunger at the top, since moving the plunger rod up or down had no effect at all. the pump has worked fine like this, until recently, the pump would stop and the belt would slip on the flywheel before it was finished its cycle, powering off and moving the flywheel by hand you can feel resistance and the cylinder won’t move- like it’s air locked, waiting until the pump cooled made the restriction go away.
What might the problem with my compressor be?
Older compressors are a witch! Please upload 3 or 4 photos of what you are asking about so all visitors can see and comment. Thanks.
since the time of writing my original post, i disassembled all the air lines from the pump to the inlet of the receiver and I found a lot of black gunk, I cleaned it all up and polished the parts with a wire wheel on my bench grinder. I also removed the valve assembly and dissassembled and rebuilt that. I think it was a mistake to stretch the spring that pushes down on the brass valve disc out a little bit, since it was almost completely flat. Now it won’t build pressure and air is flowing a lot as compared to before from the large port on the side of the cylinder head.
images:
I have a Snap-on compressor model# BRA8WH serial# BA22959. I have noticed that when the psi rises to 75 the compressor seems to slow down or start laboring. Everything sounds good in the motor. Any ideas?
Ashely, if nothing else has happened regarding location of use etc., the certainly suggests that the run capacitor on the motor may be failing. See the page on this site about how to test that, would you, and let us know if that was the issue?
I have a 220v 500a60 Sanborn compressor that I am having some issues with. It will run and build to about 40 psi then it acts like the pump is locking up then kicks back in then slows down again and will eventually kick the breaker on the electric motor. I have changed the electric motor. Put all new gaskets in the pump and I am still having this issue. Can someone please help me out here. Its driving me insane considering I’m in the process of restoring an old truck. Any help is appreciated. Thank you.
Hi Curtis. If it’s a belted compressor, remove the belt and cycle the pump by hand. Try to determine if there are any mechanical impediments. If none, empty the tank, pull the tank check valve and make sure it’s not compromised… allowing air in but not out. If that’s all good, then you’ve a couple more things to check, all covered on the pages on this site already. Please use the search box or the pages with links to locate and read them. Do the further checks, and please advise what you found.
I have a NorthStar (25653) 20gal compressor and want to use it with a pressure blaster. In stock form it only puts out 5.0cfm @90psi and 6.0cfm @40psi. I saw a modification where someone had this same compressor and changed the regulator to an 80cfm @100psi. What parts do I need for this modification and is it advantageous to use a 3/8″ pressure regulator. Would like to add a filter too. Thanks, Robert.
Hello Robert. Your post was moved to this page.
While increasing the size of the regulator to full size may provide marginal flow improvements, if the compressor is designed to output 5 cfm at 90 psi, that’s what it will put out, not more than that.
Further, the output of the compressor is limited by the fact that the motor is 115 V.
Going to a larger regulator will do little to improve the flow. Adding a filter will always add benefit in terms of air quality, and it will limit flow a bit, though better than if it was a mini-filter you were adding.
I’ve added a photo of what I believe is your compressor so folks can see what we’re talking about.
Photo: Northerntool.com
I have Coleman Powermate 40GAL.115V CL0504013 I was doing some up grades to lines and fittings to get better flow 1/2″.
I am adding an after cooler and was thinking about up sizing the line from the head from 3/8″ compression tube to a 1/2″ compression copper tube to the tank.
Would this tube size tube hurt the pump taking too much compressed air out of the pump too fast.
As I am adding a cooler as most have the un-loader to relieve start up.
If put a in line 1/2″ check valve before the cooler this may cut down the line length for the loader speed up the pressure release to the head.
Should I take out the top of the tank check valve or can I just leave it in the system?
The next would be the stock built small REG. that has to be upgraded to 1/2″.
I use this compressor for auto1976/2017car 1977truck & home a far amount of sand blasting small workbench cabinet, But as you know it a little bit small far this trying auto trans cooler help remove more water to try to get 3 min work done steps, rest let air build up so on. I have it all on 1/2″off the compressor 120psi to cabinet, and at the cabinet reg turned down to 40psi and water trap in to cabinet. It works pretty good for the set up being that small.
The set up 3/8″ was not sure that 3/8″ head hole going with the up size 3/8″ fitting to 1/2″ to compression fitting of 1/2″ copper would not make the reed valve work harder. As that would be the only thing that I might see being a possible problem
There is a check valve in the top of the tank in between the pump and the motor. The problem I see that ever one has when adding a cooler the extra length tub or hose in there cases is the length tub to the check valve. The air in the tube to the head longer take to long and or waste compressed air when it time for the un-loader lets off the pressure for the head for start up. By putting in a inline check valve around the cooler it trap the compressed air at the cooler, making the line all most the same length as the factory one from the head to the tank. So it should dump in the same time frame as it did. air out head to cooler out of cooler to high pressure 3′ hose to water trap to tank. This is for now.
Yes that will be true. I just have to time cycle the work and rest time for the temp pump and work at hand so it stays on the cooler side of a hard work out As I have had this compressor since 2005 only ever had it hooked up to110V so far but does come 220 too. I will be add extra 30 or 40 GAL tank and will be adding 3/4″ copper line cooler water drain soon.
Thank you for your complete reply. I’m always pleased to see that someone works out how the compressor works… completely, and when modifying, takes that operation into consideration. Good on ya!
— up dated:
So the cooler I used was B&M super cooler #70266, the Dimension 11x8x1.5 aluminum construction. tested at 200PSI and 1/2NPT fittings no hardware included. I made up a frame and bottom support toke three shroud screws out got longer one to hold the upper frame and the lower support helps take some of the weight off. The lower support is mounted to the back of the handles bolts. So then I had to fill in the upper and lower part of the frame support that the cooler did not cover I used some old fish tank light top filler cover cut to fit. I run beads on the insides of the aluminum C channels to fill in any high spot off the shroud so it sit tight. This makes it pull in air throw the cooler. So far this is work well for light to med work that I have done. I have not had time to do good work out any jobs yet. The air after two or three in heat day back to back the top in line hot enough to burn you but at the bottom you can hold it no problem pretty cold. So far I am happy on this part.
I put in a inline 1/2inch check valve. I put a plug in the 1/8”tapped hole at the top side to seal it as I will not need it.
I upped the 3/8” aluminum head tube to copper to 1/2″ to the cooler check valve. Now this copper tube to the upper
Cooler fitting gets really hot once running more than one cycle will burn you. The bleeder line on the head stay the same
And goes back to the air regulator pressure switch release. This seam to work better than I thought it would work. It releases the pressure on the head and the line seam to let more of the air in the head to the tank get in the tank,( as it seem to be a smaller amount let off to waste. Now not that it much over but overtime that add up air saving and less wear tear on the pump in years forward. The 2 Hydraulic hoses are 1/2 inch, one from the outside of the water trap to the tank ( I had to change out the stock 3/8 check valve to upgrade to 1/2 inch & plug the1/8” hole) this hose is 3 Ft long 1/2″ Nptm, the one from the lower cooler fitting to the inside of the water trap hose is a 6 Ft long 1/2” Nptm with a maximum working pressure of 3500 PSI.
I tapped into the tank pressured side of the regulator so it would be a little better and the bottom fitting is 3/8” overall the 1/4″ fitting that come out. 3/8” Npt to 1/2inch coupler H style industrial (these are the highest flow of the Industrial) by Milton. For the 1/2“ air hoses run up to the ground floor out the wall to mounted 1/2inch water trap and 1/2inch regulator movable mounting board bracket station I made up. Then the upper one, coupler is the Milton V style industrial (these are the second highest flow of the Industrial) by Milton. And it will work with the M style industrial too.
I all so use this V style coupler for the spare tank hookup when needed.
Nice work, Pontiac 1976.
Well howdy, Pontiac976. I’ve added a photo of the Coleman Powermate CL0504013 for folks to see what we’re talking about.
The first thing I’m puzzled about is why an after-cooler? Granted, cool, dry compressed air is better for downstream applications, but after-coolers are themselves expensive, and use expensive energy typically. Are you using this compressor for business.. perhaps for painting? Please update me with a comment.
You sure seem to be pretty knowledgeable about compressors. It’s my experience that the pump doesn’t “care” about the size of the outflow tube from the pump head to the tank. Really, it’s the buildup of the air pressure in the tank that develops as the compressor pump dumps more and more into the tank that you want to be concerned about, and that will not be negatively affected by the size of the tube as far as I’m concerned.
I couldn’t tell from the photo, but where the tube from the pump head enters the tank, is there a check valve there? If so, I cannot understand why there would be need for a check valve up near the pump head. It doesn’t show in the photo that I can see.
Adding a larger regulator shouldn’t be an issue. The regulator setting is what controls the downstream pressure, and the size of the regulator affects the downstream flow. A higher downstream flow isn’t an issue except that it will drain the tank faster and cause more rapid cycling of the compressor motor and pump.
I have an older Coleman Powermate (model cl0502713) with an air regulator that isn’t working. The behavior is that dialing down or up doesn’t change the air output psi (the gauge shows a constant approximately 100psi reading until using something connected to the hose and in-use the pressure will drop but return to 100psi). The regulator knob has been replaced once but it only worked for a short time. Given how this compressor is designed, it doesn’t appear that the regulator could be replaced without replacing the entire manifold (picture attached). Do you have any recommendations on what the trouble is and how I could address them? Perhaps add a new regulator after the original one?
Thank you for your help.
I would suspect a failed regulator. You can use commercially available nipples to extend the existing manifold to allow you to use fairly inexpensive after market regulators. Get creative with how you plumb if needed as the air (by and large) doesn’t care the path to the discharge coupler, as long as there are as few air flow restrictions as possible.
Appreciate the help! I’ll give that idea a try.
I recently acquired a new to me vintage Kellogg American B321 compressor. I replaced the belt, the wiring to the motor, and put on a new pressure switch. Plugged her in and she started first try! Amazing. I have not gone into the guts of the compressor yet, change the oil, etc. because I wanted to see what I was working with first.
She runs great until around 45 psi — then it bogs down. At around 50 psi I turned it off as it was sounding rough. I drained the air, did the same test and realized it was bogging at closer to 40 psi. Turned it off, and when I tried to turn it back on the motor couldn’t get the belt moving.
So, couple of questions:
1) Does anyone have the old service manual for this girl? I’m sure it needs new oil, etc.
2) Do you think the bogging down is being caused by the belt tension? I am guessing not since it will run great at the beginning.
3) Any thoughts?
Thanks for you help!!
-Mike
Sorry Willy, that would have been a good idea. Please check out the two I added.
As to the bogging down, I’d check the capacitor if it were me. Good luck, I hope someone has the manual to offer. Wish you’d uploaded a photo or two.
We have an industrial air compressor that we use in several areas of the shop. In one area we us it to spray solvent based adhesive. The gun keeps leaking. We have replaced the guns completely and adjusted the needle settings. Is there an issue with the line that could cause multiple air guns (including a brand new 300$ panther adhesive gun) to leak glue?
I’m no expert on glue guns. However, logic suggests that if glue leaks after the gun activator is released, either air is still bleeding past the gun valve to the adhesive, or, the pressure in the air line to the gun is forcing itself past the gun seals to express the adhesive. Are you sure that the operating pressure of the line to the gun does not exceed the adhesive gun operating pressure?
Hello. I can’t seem to find the problem im having. When I run my craftsman 60 gallon compressor smoke starts coming out of the intake port once it warms up. What would be the cause?
Hmmm…. I suspect air is coming out of your intake port from start up, but once the pump head heats up, that’s warming / heating the lube oil, and that’s offgassing “smoke” that’s now visible.
First step… nothing should be coming out of the intake port. That’s a sign that the intake valve is broken. That will need fixing first… and then, if it persists, why you have “smoke” being generated at all? That suggests a pump head overheat to me.
Something I can’t find any help on is the delivery tube between the compressor pump and the check valve. There doesn’t seem to be any info online about the fittings, sizes etc, and definitely no spares or replacements. Do you have any advice or info on replacing or fabricating them?
Many thanks.
If you have the old one, and even if you don’t, when times permit, take it to a good, industrial plumbing supply house. They’ll likely be able to make one for your from soft copper tubing. You can do it yourself, of course. It’s just that the tubing needs a bend tool to keep it from crimping when bending to suit. As far as the fittings go, as long as they fit, and they don’t leak, any will do.
Can someone help me out here.
I don’t understand what’s going on? I attempted a fix on it with an air hose that withstands 300 psi, but it still bursted before the tank could fill up with air! Help please
Are you saying that the hose burst, not at the clamps but mid-hose, before the compressor reached the normal cut out pressure, and the hose is rated for 300 PSI? What was the pressure showing on the tank gauge when the hose burst, if that’s what’s happened. Thanks.
I have a very old compressor (areograph) that I’m trying to restore. It has no check valve and the main compressed air outlet from the pump goes straight into the tank. There are a couple of small pipes coming off the piston head, looks like on top of the inlet valve side of the pistons, they are broken off and do not connect anywhere. From old photos on the internet of similar compressors, it looks like these used to connect into the tank too via a separate connection. In which case I don’t understand what they’re for, and also how pressure from the cylinders is released when the motor stops…? Looks like this is designed to add pressure to the cylinder head (on the inlet side) rather than take it away? Can anyone advise?
I have an gasoline hitachi air compressor double tanks.. The muffler keeps getting filled with gasoline,why would that be? I’m not a mechanic and I do appreciate someone commenting. When I pull the string or crank it fills the muffler up with gas…
This one I’ve no idea, Juan. I hope another visitor can comment.
Have an Hitachi hot dog or twin tank small job site compressor. Motor and compressor runfine but no air into tank but can feel air escaping from underneath tank as it runs.
Perhaps you might check the tank drain valve to be sure it’s shut tight? If so, tighten it shut. Did that solve it? If not, you’ll need to look closely to find where the air is escaping from. A soap solution 1 part liquid dish soap to 10 parts water, brushed onto areas and fittings, should help pinpoint it. Also, is it only leaking when the compressor is running, or also when it’s stopped?
Only running as it will put no air in tank it all blows out underneath tank somewhere
Where?
Hi there
I’m after some advice on how to connect copper piping to my tank. Please refer to photos. I know the hole on the left will be fitted to the compressor pump with a check valve. Not 100% sure how to go about fitting the pressure switch and unload valve as the other 2 holes are set as a “T” type fitting. Some assistance would be much appreciated.
Dave DeSantis
Thanks for the photos, Dave. That sure helps.
The tank is just an air holding device. How you plumb it, or plug ports into it, is entirely up to what you need to add to the tank. Yes, you’re quite correct that typically the line from the pump head enters the tank through a fitting with a tank check valve. And yes, often that fitting will have a port on the side of it to allow a line to plumb over to the pressure switch unloader valve.
As to how to plumb the pressure switch, depends on what type. Some have the PRV and gauge ports in the base, others have them plumbed in a line. What switch are you planning to use? This photo shows one set up, but yours could be entirely different depending on what parts are to be installed in the base of the switch or adjacent to it.
I have a briggs and Stratton air compressor that I bought last year.the model# is 074079-00.
it now only builds pressure to about 70psi.
it runs and is pushing in the feed line but the pressure will not go past 70psi.
i found some dirty water in the tank and drain it.any help would be appreciated.thank you.
Sure Steven. Have a look at this page: http://fix-my-compressor.com/when-an-air-compressor-runs-and-runs/
Hello.
I was given a compressor that was purchased at Sears around 2010-2012, but the owner switched the parts to a different tank so I don’t have a model # to search for parts.
I know this likely is not nearly enough information, but all I have is some motor and pump information.
The pump doesn’t appear to have any branding. There is a cast # “335” with a stamped area following with what appears to be i 10 (capital “i” and the number 10) The only other identification I could find on the pump is under the air intake on the head, in the machined surface directly below where the 1″ NPT port is. It appears to say F J10 078
The pump is a 2 stage inline pump (not a V). It has a pressure release valve in each head where some higher end pumps would have unloaders (I believe)
The motor is a 208-230 volt 22 amp and the part number is marked as 7-186372-01. Century AC Motor AO Smith with a R56Y frame.
It was purchased in Canada, and I don’t remember if it was branded as Craftsman or something else. I know this isn’t much information, but I thought i’d try.
Cheers !
Hi Joel. Your post was moved to this page as we couldn’t determine what it is you were looking for with regards to your compressor. Please provide this information, and, in your comment on this thread, please add some photos of the compressor in question. Thanks.
I have an old Emglo electric wheelbarrow type compressor. It seem to develop resistance to spinning while it builds pressure. As it builds pressure in the tanks it slows the motor from turning and will either stop the motor or make the belt slip. I have put different motors on it that work in other compressors with the same result. If I run it with the tanks open the motor continues to run fine. As soon as I close the valves and start to build pressure it slows again. Any ideas?
I have the same problem with the same compressor. Motor is fine, but slows down as tank pressure builds. Did you solve your problem? The tank valve isn’t blocked because the air goes into the tank, and doesn’t come out with the line to the valve fitting disconnected. Thanks in advance for any help.
Hi David. My first thought was that was the motor capacitor failing, but if a change in motors did not resolve the issue, I would look now to the valve plate in the cylinder head to be a likely candidate. If the pressure valve side has an issue, it is possible that it isn’t allowing air into the tank once the back pressure reaches a certain threshold, slowing the pump, eventually stalling it, and overloading the motor as well.
Before tackling that, pull the tank check valve and ensure that it is not blocked in any way, will you? Be sure to dump all the air before opening any fittings.
willyr,
Thank you very much for your help and suggestions for setting up my air lines and regulators. I took your suggestion and purchased a water-trap to replace the water-trap regulator combo I originally installed at the air compressor tank.
That was a great suggestion to junction all the ball valve drops at the after cooler manifold and add an auto drain.. Parts have been order to install auto drains. One at the bottom of the compressor tank, and another for the aftercooler manifold.
The system is 99% complete minus the auto valves.
Again, thank you for your help!
Mike,
Most welcome.
Help needed – Set up for Installing new air compressor piping system.
Components used:
1) Air compressor – 2019 Ingersoll Rand vertical 80 gallon two stage, 5hp 230v. continuous duty at 175psi.
2) Aftercooler manifold – 3/4″ type “L” copper piping, 72′ total run ( See attached picture)
3) Air line from aftercooler manifold – 3/4″ type “L” copper, 20′ total run.
4) 3/4″ combination water trap/air regulator, 11oz bowl – make, THB – installed at compressor tank..
5) 3/4″ air filter system including water trap/air regulator, coalescing filter and desiccant dryer – 11oz bowls. Attached at end of copper piping run.
Question:
1) Am i making a mistake by installing a combination water trap/air regulator at the compressor tank? I was assuming I would catch some water coming out of the tank before it reached the vertical aftercooler. Then let the vertical aftercooler do it’s job.
2) If it’s okay to used a water trap/air regulator at the compressor tank, will I damage the water trap/air regulator from the compressed air heat?
3) air compressor system is being used for spray painting.
Thank you,
Mike
Mike, nice looking setup.
1) Nope, it’s common to have a filter (water trap) at the exit from the tank to the mains. No, I would not put a regulator there if it were my setup. I’d have full air flow to the point of use, and then add regulator there. Putting a regulator at the tank, and another at the point of use may lead to an air starvation at the point of use, depending on the regulator settings.
I think I see that you’ve got a bleed valve at the bottom of each cooling manifold vertical run? Rather than having to manually drain all of those valves, why not gang them all to a single valve to be left open unless necessary to close it and one single electronic auto drain that will cycle as needed and drain air and water for a few seconds or so each cycle? If you do that, adjust the cycle frequency and drain open time to allow each cycle to drain all the water each time it cycles.
2) Not likely that a filter at the outlet from the tank will get overly hot from the air heat. Yes, heat will build up, but that’s a pretty big tank, and I doubt it would build up enough heat from the air to damage a filter. And, again, I wouldn’t put a regulator there it were me.
Hi, I have a 3HP 20A 135 PSI air compressor. It was working fine for many years and then recently it started having trouble running past 60PSI as the motor would start to slow down and then eventually hum. I replaced the check valve, unloader valve, and the air compressor “switch” with new parts. No change in behavior after changing each of these parts.
What else could be the problem? Thanks!
Sounds like it could be a capacitor problem. Please see the page on this site about air compressor motor capacitors and how to test them.
Thank you. I thought so too so I got replacements. Tried both a new run and start capacitor and did not change. What I did since then is
1. Remove the belt. The motor started and stopped with no problem.
2. Replaced the belt. I noticed the belt was starting to crack so replaced it and adjusted the tension so that is has about 1/2″ of deflection at the midpoint. I can easily turn the compressor pulley easily with my hand.
3. When the tank had no air, I started the compressor. It worked fine and eventually got to operating pressure of 125PSI. Turned off the pressure control switch.
4. I released the pressure from the tank down to 80 PSI and turned on the pressure control switch. At this point noticed the motor was straining and turned off the pressure control switch.
5. I removed the main air filler tube from the compressor to the tank. Turned on the pressure control switch. Motor turned on no problem. Turned it back off.
6. I reinstalled the main air filler tube and removed the smaller unloader valve tube. Turned on the pressure control switch. Motor turned on no problem. Turned it back off.
7. I replaced the check valve with a new one. Motor turned on ok from 0 PSI and pumped to 125PSI. I then turned off the motor, drained the tank to 80 PSI. Turned on the motor and it was straining and unable to turn the compressor. Turned it off.
8. I then replaced the unloader valve, again, the motor was straining with 80 PSI in the tank. I then removed the unloader tube and again the motor was able to turn on.
9. I then screwed the unloader tube back on the unloader valve while the compressor was running and the motor was able to get the tank back to 125 PSI.
At this point, I have concluded when the motor is trying to start with air in the tank with 80 PSI it is unable to start.
I have replaced the check valve and unloader valve, Belt is properly tensioned. I did try to use new start capacitor and motor still was unable to start. Only when I disconnect the unloader tube and start the motor and then connect the unloader tube does the compressor work correctly. Not sure what else to do?
Thanks
That’s a very good description of work performed. Thank you. All of the steps taken are necessary to “fine tune” where the problem on the compressor is located.
What I’m understanding from your excellent description is that there either must be an air block that is preventing the air from the pump compression stroke from entering the tank when the tank pressure reaches a certain point. In other words, the back-pressure exceeds the ability of the motor to overcome the problem, and the motor struggles, or, the motor itself is failing and hasn’t the ability to develop enough force to overcome load.
What’s next? You’ve taken the check valve out of the equation by replacing it. The motor should have enough power to pump with back pressure due to the new capacitors. If it isn’t the motor itself, the only other thing in the air path from the compression area to the tank is the high-pressure valve or valve plate. You will no, unless you want a load test on the motor first, want to dump all the air and open up the head of the pump and have a look at the valves.
Thank you. Are you suggesting I tear open the head of the compressor and inspect the valves?
In regards to more testing, this afternoon I tired various combinations of running the motor with air, without air, with the high pressure line connected/unconnected, as well as low pressure line connected/unconnected.
What I found was the following
1. No air in tank, high and low pressure lines connected-> works
2. Air in tank (as little as 20 PSI), high and low pressure lines connected-> motor will start, strain, and then stop
3. Air in tank, high pressure line connected, low pressure line disconnected-> motor will start, strain, and then stop
4. Air in tank, low pressure line connected, high pressure line connected-> motor will start and run
In scenario #4, I then let the motor run for several seconds and eventually screw in the high pressure line to the compressor.
Motor will eventually get the compressor to about 110 PSI and then slow down, strain, and stop.
This morning I was able to get the motor to pump to 125 PSI and have the pressure valve cut out. Now it wont.
Wondering my motor starting to die? What would be the symptoms?
I don’t see where you identified the make and model of compressor Ramon, unless I missed it? 🙂
However, with the tank empty of air, power cord out of socket, look at the top of the piston / cylinder and look for cap screws or bolts. Start by loosening them and see if the top will lift. Other than that, trial and error.
Is the motor starting to die? If the pump is fine, if the line to the tank is fine, if the tank check valve is fine, if there are no mechanical impediments to stop the pump with low pressure in the tank, then it’s pretty much got to be a problem with the motor.
No auto unload and show air pressure high and then stop compressor plz ansme
Make and model of compressor? How old? When you say it has no unload, pretty difficult to even start offering help when we don’t know what compressor you are talking about. Please update the thread with more information. Thanks.
I have 1.7 hp,33gal it will fill up one time and will not start for 3hours . Model# 516-051 what can I do to fix it
Terence, is it taking much longer to fill up to the cut out pressure than normal?
It take for ever to fill up
We don’t know what make or model of compressor you have, Terence. However, that symptom is often associated with a leaking pump gasket or a pump head valve having failed. More info will be necessary to be more specific, though the troubleshooting page on this site has lots of info on this too.
My 60 gallon compressor sounds like it “misfires” as pressure gets to 80 or 90 psi and above. My shutoff I’d 120 psi. I have new motor and air compressor. Wha’t are possible issues for me to inspect?
No idea what “misfires” means. Pump stops for second, motor stops turning… more info please? Also, please add in your comment the make and model, how old it is, and if you can upload a photo or two, that would help.
I’ll get video and post shortly. TYVM
Here are pics and video of what I am trying to describe. You can see the v-belt flutter a bit when the “mis-fire’ is heard. Thank you!
I do see and hear exactly what you are referring to, Tony. First thing I’d do is check all the electrical connections for tightness. The “hiccup” is so fast, that it points to an electrical blip as far as I can see and that could be caused by vibration in a loose connection. Please check that out and advise.
Hi
Been reading with great hope but can’t find a direct answer to my issue. I have a Sealey 3hp 200l compressor which has been stood for 9 years. Brand new when I got it but never used it. I’ve dusted it down and put fresh oil in. Drained the tank. On start up it runs for a few seconds and trips the thermal overload. Took the belt off and both engine and motor turn easily by hand. Replaced the caps but I still have the same issue. Now my next thought is the power. It’s in my garage which is 50m away from the house (power) so I’m wondering if it’s as simple as my garage is a large extension lead! Being so far away from the house and awkward to get to a closer plug socket do I have any other option on testing my theory?
I would think that a 3 HP compressor may be border line portable. That being the case, move it so that the plug from the compressor reaches a wall plug as close to the power panel as possible, preferably a plug with no other appliances using power from that same line. The issue sounds like it’s power related for sure. It could also be binding of the pump piston itself, which, when you remove the belt, removes the load on the motor. Move the compressor if at all possible and let us know as a comment what happened if you would. Could you also add a photo of your Sealey compressor? Thanks.
Little update. I plugged into my neighbor’s garage which apparently is 3 phase but still at least 25m from the house and the same issue. I’ve now put the belt back on and now I get a brrrr noise and it trips the thermal overload. Doesn’t even try and turn!!
Thanks for the photos.
Double check the cap wiring. You are certain that the start cap is the same rating as the original? Pump sheave turns freely by hand? If all these are OK, then I would be concerned about the motor itself being the issue and you may need to get a load test done on it.
I swapped each wire one at a time so it’s like for like. If it’s right is another issue. I’ll see if I can find a wiring diagram to see if they were right from day one.
When open the air locker water will come with air in borewell compressor why
When you say “air locker”, do you mean the compressor air tank? And, when air is coming from the tank, it has water in it? If so, do you drain the tank to get rid of condensed water? Perhaps, as a comment here (click on the camera icon to upload photos) you can add a photo or two of your compressor?
Hi i spray wd40 on my air crompresser now it doesn’t work any advice
Where and why did you spray, and what’s the make and model of the compressor please? Is there are in the tank, and if so, what pressure is it?
I have a new California Air tankless compressor. Using it with high speed carving tool, Vortex F5. It will only run about 15-20 min before shutting off due to overheating. What am I doing wrong???
Air compressors sometimes have duty cycles. That means that they are designed to run for a period of time, and then must be shut off and allowed to cool before they are run again, or they 1st go off on thermal cut out, and 2nd start to damage the motor. It sounds like your air demand for the carving tool exceeds the capability of the compressor to provide sufficient air for the period you need it without allowing it to cool.
The duty cycle is supposed to be an hour steady use. It’s the compressor that’s sold with this tool. Specs to comply need to be 1 horsepower, meet rate of 3 scfm @ 40 psi. I did set it to 32 psi ( as recommended. I just feel like I don’t know enough about compressors and the manual is vague, so just thought I had something set up wrong. Thinking of returning it, starting over with another one. I’m carving egg shells not stone! Thanks.
Hey, if the duty cycle is advertised as one hour steady use, and you’re using the air tool that came with the compressor, then it’s one of two things. You have a compressor that was built on a Monday or Friday (:-), or… how are you getting power to the compressor. Not using an extension cord, I hope? Please advise.
No not using extension cord. Using power cord that came with it and foot pedal.
Take it back for one that works as it is supposed to, then. Good luck.
My hausen cambell compressor has 2 tanks when air presure drop to a certain level the motor want kick back on
And why, when your Campbell Hausfeld tank pressure drops to the normal cut in point would you not want it to start again? I fear I’m not understanding the question.
I have a Ingersoll-rand model T30. It has a hard time building pressure. at about 20lbs the motor over heats. I took the belt off and the motor runs fine. I took the copper tube off going to the air tank and it runs great. It just is struggling to build pressure. I have changed the oil and cleaned the air filter. please help
Tom
Empty the tank and check that the tank check valve is working OK. Sometimes it cruds up and prevents air from getting into the tank. But, likely it’s power related, and that means checking the motor capacitors first. There’s a page on this site about how to do that.
im awear my kobalt compressor model 0300841 is out dated what can i do to replace, repair,modifie the regulator
That’s a tough one due to how they’ve installed the regulator on the manifold. If you are OK with removing the manifold cover, maybe leaving it off, and plumbing in a standard, off the shelf, $15 general purpose regulator that you can acquire from almost every shop that sells compressors as a replacement, your options seem limited.
the flapper valve of my compressor is broken so i change the whole compressor to repair the broken compressor, and by just over night when i check the new installed compressor it turned out that the BRAND NEW installed compressor encountered same problem. .. Its flapper valve got broken, same as the one i changed.
Parameters before start
Strainer Inlet – clean
Oil level – OK
Oil = BRAND new as FACTORY OIL
Parameters I check during I running
HP-with in the specs
LP – with in the specs
Oil level- OK
Not knowing the make or model of air compressor makes the possibility of anyone helping with the problem impossible.
my motor starts fine but its not compressing at all.
Sorry about your motor. You are referring to an air compressor motor, yes? If so, what make and model of compressor please? How old? Ran well until now? Please provide more information along with a photo or two of the compressor so we can try and help.
Compressor runs for a while then abruptly stops
Make, model, air pressure in tank when it stops, does it start OK at the same pressure, when it stops is the tank pressure always the same when it shuts down? Anything new about the power supply to the compressor?
Air compressor cuts off at half full
Can’t much help without knowing the make and model, the normal cut in pressure and the normal cut out pressure. Please provide more info, Steve.
Hi, I have a twin 4hp motor compressor 47cfm
Its not been used that much but the other day one of the motors was red hot and the rubber air intake was melting.
I switched it off.
On closer inspection the oil in that motor was really dirty so I drained it out.
This is as far as I have gotten as I can’t seem to find anybody in the UK the will service it. 🙁
Thanks
Jonny
Jonny, in your post you refer to “one of motors was red hot”. Are you perhaps referring to the pump cylinder? I know of no air intake on a normal compressor motor, though they often have grills to allow air to circulate. Please explain further, and also, what’s the age of the compressor, the make and model too? (Post was moved to this location.)
I have a Porter Cable 24 Gallon from Tractor Supply. I got it non working for a deal but have never gotten it to work. The cooling fan on the backside works but the compressor will not kick on. I checked voltage across the pressure switch and everything reads 125v. I checked capacitance on the 2 caps and they both read withing +-5% of what they should which is in range. I’m kind of lost at what it could be. Model is PXCML224VW.
Thank you in advance!
Zach, your post was moved to this page. You’ve checked the power supply to the compressor pressure switch, across the pressure switch to the motor circuit, then to the capacitors, one of which will be the start cap and the other the run cap but the compressor won’t kick on.
Typically the cooling fan is attached to the same shaft at the drive shaft for the pump. If it is on this model of Porter Cable compressor, that suggests that the motor is running, and since this is a direct drive system on this compressor, I think, then the pump should be cycling.
You’ll want to pull the compressor pump and motor cover and check out the direct drive shaft to ensure that it’s not broken or come unlinked some how. Let us know what you found, would you?
Hi, yeah I mean the pump 🙂 and the model is a Clarke Air industrial XE29/270
Well, since it’s a Clarke, can they not help you find service? https://www.clarkeinternational.com/pages/clarke-service-support
Is the cylinder that’s getting so hot pumping air into the second cylinder, or does it pump into the tank?
Why does it bog down and go back up
James, there could be many reasons why an air compressor runs, bogs down, speeds up again, etc. They are not the same for every compressor however, and since you don’t tell us the make or model, no way can we check. Perhaps you might add that information as a comment, and also please upload at least one photo of your compressor so we can see it. Thank you.
i accidentally locked my brand new oilless air compressor “regulator knob” how can i unlock? as currently i only can rotate till the knob is detached however before accidentally locking it the black knob was rotating separately from the red ring but now it doesn’t move, the whole thing just detaches when i rotate.
i need a solution how to unlock the regulator knob back to its position as it says on the knob to push to lock so i tried to pull to unlock but with no luck
i didn’t even use my air compressor yet i was figuring out how to use it and i accidentally locked it, I’m not sure if working with it while locked is ok i don’t want to do another mistake
i attached 2 videos 1 explaining my knob how i cannot move the black knob separately from the red ring and the second video explains how it was before locking
Shamma, only one of the uploads has a video. The other appears to be just a sound file. In any case, dum question, but with the red ring now touching the black knob, can you rotate the red ring clockwise as far as it will go, and then, can you push down on the black knob to see if that allows the handle to engage with the gearing inside? Please try that and let us know.
i attached the video file again just for clarification that the whole knob only moves and not separately from the red ring
try downloading the video, i tried and it works. you can see how the full knob turns together and if turned fully it detaches
I’m technologically inept, I guess. Downloaded or not, I don’t see any video, Shamma. OK, don’t sweat that.
The knob has become detached from the gear or spline inside the regulator. When you thread the regulator knob all the way off, can you remove the red ring? I believe it’s preventing the knob from reaching the gear or spline inside the regulator.
If that doesn’t work…
I think it’s time to return the compressor for a new one, return the regulator for a replacement (which they likely won’t do as it was part of the compressor) or since these regulators sell for under $20 new, at a decent hardware or big box store that sells tools you might need to acquire a new one.
i cannot rotate the red ring separately nor can i push down, the only thing i can do is rotate the whole thing and if i did fully it detaches
The rings on my compressor have gone bad resulting in a tan oil/moisture mix when I drain my tank. I’m in the process of replacing the rings but my concern is the that there is now this gunk in my tank and air lines, What’s the best way to flush everything clean?
Interesting issue, Joe. Yes, you’ve got a slurry of water / oil and gunk in the tank. I suppose with all the air vented and the power off, and depending on the make and tank access your compressor has, you could open the tank and the tank drain, put in a little solvent, roll the tank a bit and try to get this stuff flowing out the tank drain. I wouldn’t if this were me.
I would let the compressor pump the tank up to cut out pressure, crack the tank drain enough to allow a little flow, and let that new air drive the puddle on the bottom of the tank out the drain. Then, in time, once that all was voided, most of the oil and crud would be gone and I would shut the tank drain again. Since you should, normally, drain the tank of air regularly, this will purge the tank in time as well as voiding new water / crud build up. Of course, the stuff coming out will stain cement and wood floors, so put a catchment under the drain.
The same for the air lines. The flowing of air down the lines will eventually drive debris ahead of it and out the end.
If that “end” of the air hose happens to be an air tool or valves or some such, that’s where the crud will go. Rather than that, use an inexpensive blow gun to vent air from the lines until the air flows clear.
Anyone else have some thoughts for Joe on this?
I should add that I’m planning to paint a car in the very near future and I’m paranoid about oil coming out of the lines and contaminating my paint job. I will be adding a good water/oil filtration system prior to the paint job.