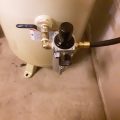
No matter the quality of your air compressor, you’re always likely to face some issues. The most common issue for an air compressor is a leak which causes the compressor to not work properly. Different parts of the compressor can cause leakage. You will need to identify the exact location and the exact part that causes this leakage.
A hose leakage is probably the most common of all leakages in a compressed air system. And so, this article will provide a guide on how to fix a leaky air compressor hose.
Table of Contents
Hey! This site is reader-supported and we earn commissions if you purchase products from retailers after clicking on a link from our site.Fixing a Leaky Air Compressor Hose – The Tools
Let’s start by detailing the tools you will need to have handy so that you can complete the task. To fix a leak in an air compressor hose, you will need:
- Air compressor hose repair kit (specifically a coupler and 2x hose clamps)
- Cutting knife (or sharp cutting tool)
- Screwdriver (preferably flat head)
- Electrical tape*
- Plastic bag*
* Required for the additional safety step.
How to Fix a Leaky Air Compressor Hose
Now let’s get into a step-by-step guide on how to fix a leaky air compressor hose. First up is a simplified version, followed by a more detailed description!
How to Fix a Leaky Air Compressor Hose
- Find the leak
Locate the exact location of the leak.
- Cut the joining
Cut down the joining to enable you to fix it with new parts.
- Insert new air hose kit
Unpack and install the new air hose kit, using the clamps the secure the hose in place.
- Additional safety step
You can wrap a plastic bag tightly around the hose, using some electrical tape to secure it in place, for additional safety.
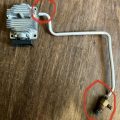
Step 1: Finding the Leak
The first step to take if you are trying to fix a hose leakage, you need to find where the joining is between the hose ends so that you’re able to start the repairing process from here.
In some cases, you may find the leakage is occurring in a different place, therefore, you may have to replace the entire hose. But in most cases, the leakage will occur at the joint.
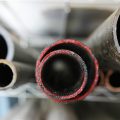
Step 2: Cut the Joining
Now that you have pinpointed the joining area of the two ends of the hose, it is time to cut down the joining so that you’re able to install it with the new kit. At this point, make sure that you are using something very sharp that can easily cut the hose.
In the situation where the hose is too thick and difficult to cut through with your cutting tool, you could use a professional saw to get through it. Do not cut any extension of the hose otherwise, you may cause further issues. You should aim to produce a clean and nice cut that will allow you to proceed to the next step.
Step 3: Insert New Air Hose Kit
Once you have cut the joining, you can remove the old kit from the hose. Now you can unpack the new replacement kit and check if all is ok there. Now place the coupler from the kit inside the hose. It should fit properly to the hose width.
Once the coupler is in the right place, you can begin to secure it with the clamp from the kit. Using the flat head screwdriver to tighten the clamp gently, so that you can create a smooth and secure fit.
A tip is to apply some heat to the hose for additional security. This will cause the hose to fit more tightly around the coupler. As well, heating the hose doesn’t require anything extraordinary, you can simply use a lighter. Repeat the same process for the other end of the hose.
Step 4: Additional Safety Step
As an additional step, you can provide great safety and a more secure connection between two ends of the hose, by applying a plastic bag to the hose. The process is simple, all you have to do is wrap the bag over the hose.
After wrapping the plastic bag tightly, use some electrical tape to secure the plastic in place. Start from one side and wrap the tape over the bag. It is generally advised when doing this step, to add a slope to the surface so that after taping the bag, it is less likely to get caught when being dragged around.
This can be better explained in the YouTube demonstration below!
After you have completed these steps, you should reconnect your hose to your air compressor and turn the compressor on. Monitor the repair as compressed air flows through to the hose and ensure it is not leaking any more!
When buying an air compressor hose repair kit, you should be buying the best available regardless of the costs. To be able to make sure that the repair works, you need to spend the extra cost. Below is an example of an air compressor hose repair kit on Amazon, which boasts terrific reviews from all users.

- Same tools. New name. Hitachi power tools has renamed to Metabo HPT
- 3/8-inch air hose repair kit
- Brass splicers, steel clamps
Last update on 2025-06-18 at 16:49 / Affiliate links / Images from Amazon Product Advertising API
Here’s another YouTube demonstration that may be able to help you with your fix!
Please leave a comment below if you have any questions regarding fixing a leaky air hose!
Related posts:
 Air Compressor Fittings for Tank & Pump – NPT, Metric, Styles & Information
 Can I Use PEX For Compressed Air? Ultimate Guide To PEX Pipe
 Best Pipe for Air Compressor Lines – Pipe Materials or Air Line Plumbing Guide
 Compressed Air Oil Separators & Water Separators – How They Work & Why You Need Them
 Practical Guide to Running Air Compressor Lines in Garage Workshop