
The is page three of the instructions for replacing a compressor pressure switch.
If you just landed here and want to follow the instructions from the beginning, here is page one.
Well, so far we’ve disassembled the old switch, added the unloader valve fitting to the new switch, and threaded the new switch onto the tank nipple, and then connected the unloader valve line.
Next in the replacing a pressure switch hit-parade is to reconnect the wires.
As you will know from reading the instructions so far, there are two sets of wires that need to be connected to the switch. One set comes in from the power cord and the other is from the motor. On this air compressor each set of wires has one black, one white and one green. Here’s how we’ve hooked them up on the pressure switch.
In the image below this pressure switch has a ground screw on both sides, one for each green ground wire.
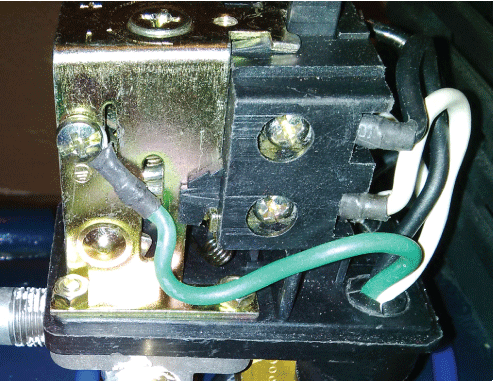
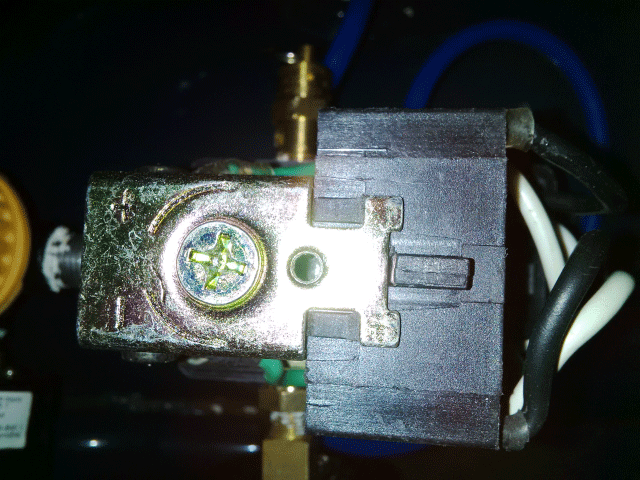
You can see we have attached one of the green ground wires to the ground screw. It doesn’t matter which side you attach the ground, as long as all ground wires are attached to one of them. Have a look underneath the ground screw and you can see an image that looks a bit like this:

That’s the electrical symbol for ground or earth, and when you see it on an electrical device it indicates that this is where ground wires should be attached.
On the right of the image above you can see a black wire and a white wire attached to terminals on this side of the pressure switch. On the other side the black wire is attached to the top terminal and the white wire is attached to the bottom terminal as well.
On this pressure switch the switch innards move up and down as the switch works, alternatively making a circuit with the two black wires or the two white ones, depending on whether the switch is tripped or not.
Caution: Your pressure switch may not work the same way. Look for terminal markings that will indicate where the wires go, and ensure that when the switch wiring is installed, that it’s the two black wires and two white wires that are connected alternatively as the switch operates.
One of the things we like about the pressure switch we bought as a replacement is what you see in the next image. On the top of the switch there is a large phillips screw. Turning it one way increases the cut in and cut out pressures, and the turning it the other reduces it. When we installed the switch we dialed it down a bit to see the effect. Works well. A neat feature that we think all pressure switches should have.
OK, we’ve got the pressure switch on the tank mount, the unloader valve hooked up, and now we’ve got the wiring done. Time to add the rest of the accessories.
In this next image the switch has been covered, all accessories including the pressure relief valve (on the other side of the switch), the tank pressure gauge and the discharge pipe through the regulator and on to the discharge coupler have been installed.
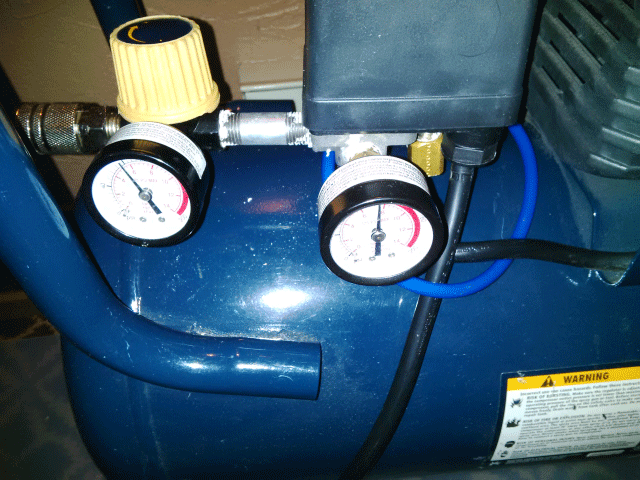
After reassembly we have started up the compressor. See the tank gauge on the right. That’s the pressure setting where the switch tripped to off, and the compressor shut down.
Success!
Got any questions? Use the comment box below.

On the picture of the wiring, which side goes to motor and which one to line. I don’t see any ‘motor’ or ‘line’ labels. The only thing I see is a ‘+’ and a ‘-‘.
If you look closely at the workings of your pressure switch, you will see how the points open and close as the switch trips. Typically, the power supply wires are connected to the terminals on one side of the switch and the motor side wires to the terminals on the other side of the switch. In other words, when the switch is open, the power supply goes to that side, and when the switch is closed, the motor wires are attached to that other side, so that when the switch closes, power is fed to the compressor motor. There has to be ground or earth connections on the switch as well for the ground wire on the motor side, and the ground wire on the power side.
It really doesn’t matter which side of the switch has the motor wires and which side has the power supply wires, as long as they are separated by the points when open.
can I safely remove the manifold on a one port and install on a 4 port?
If you are referring to a 4 ported pressure switch versus a one ported pressure switch, sure, you can. You just have to make sure that the switch is the same voltage, same cut in and cut out, and that the unloader line is connected properly. That, and you now have ports in the four ported switch for a PRV, discharge coupler and gauge, all of which were in a separate manifold on a compressor with a single ported pressure switch. So, some plugs will be in order.